Inline Assembly In Your C Program

So you think you’re a hacker and you want to embed (inline) assembly into your C program. Well in many cases it is this low level material that can exploit other programs. The ability to manipulate registers can be very powerful. I am more thinking about the efficiency advantages that can be done writing a function in assembler rather than C. This used to be more common with early compilers, but these days most compilers can produce more efficient assembly than a human. There are some circumstances, usually in the embedded systems environment, where it can be advantageous to embed assembly into your C program.

The older versions of GNU C aka GCC compiler for Linux used the AT&T assembler syntax instead of the Intel assembler syntax, nowadays you can add in a directive to inform the compiler to use the Intel syntax. The Intel syntax is more reflective of the most common assembly paradigms, the Intel syntax has the first operand as the destination, and the second operand as the source whereas in AT&T syntax the first operand is the source and the second operand is the destination.

Okay, lets get on with it. The examples of assembly are for the x86 architecture.

Embed Assembly In C

To embed your assembly instructions into your C program we use the inline asm call. We can also use __asm__( to ensure there are no variables with the name asm that we may interfere with.

int main()
{
   __asm__("movl %esp,%eax");
 
  return 0;
}

This little function moves a long from register ‘a’ to the stack pointer. As you can see its quite easy to embed assembly into your C program. Lets do something ‘useful’.

#include <stdio.h>
#include <unistd.h>
 
int main()
{
  int data1 = 2, data2 = 3;
 
  // Fancy assembly statement
  __asm__("addl  %%ebx,%%eax"
                    :"=a"(data1)
                    :"a"(data1), "b"(data2)
              );
 
  fprintf(stdout, "data1 + data2 = %d\n", data1);
 
  return 0;
}

The above example is the addition of two longs. The syntax I am using is the AT&T syntax that is expanded:

__asm__("<asm routine>" : output : input : modify);

In this case I add data1 and data2, the output is in “=a” or register ‘a’, the input is data1 in register ‘a’ and data2 in register ‘b’. So at the end I use my C fprintf statement to output the result of 5.

If you want to specifically use the Intel syntax you can inform the compiler of this by using:

__asm__(".intel_syntax noprefix\n\t"
                     "pop edx\n\t"
                     "mov eax,edx\n\t"

The .intel_syntax tells the compiler that the form being used is Intel.

Embed Volatile Assembly

In C you can declare a function as volatile. What is a volatile function? Volatile informs the compiler that this piece of code should not be moved or re-arranged as an efficiency optimization, this keeps the code exactly in the order you have typed it. For example:

__asm__ __volatile__("blah"

Now you can become the hacker you always dreamed of becoming!

How To: Use memcmp() to compare two memory locations

Comparing two memory areas can be very useful, memcmp() is the common C tool used to compare those two values. Also, depending on the type of data you wish to compare there is also a specific function for comparing two strings known as strncmp(). I plan to focus on memcmp for this article.

How do I use memcmp?

The memory compare function is provided by the gnu libc library and should be included via the string.h header file.

Its definition is:

int memcmp(const void *s1, const void *s2, size_t n);

There are a few important points to take away from this definition. Firstly, s1 and s2 are the respective memory areas to compare. The last argument is the number of bytes you wish to compare. So for instance, s1 could actually be 20 bytes, and s2 could be only two bytes. If you know that the first two bytes of s1 should be equivalent to the first two bytes of s2 you would specify to only compare those first two bytes. This gives the programmer the flexibility to shoot themselves in the foot. What if you decided you wanted to compare 5 bytes, well in this case memcmp would compare 5 bytes…but you would begin to compare 3 extra random bytes of s1 against s2. You may even run into a segmentation fault as you are potentially accessing memory not in scope. This is where the programmer should be right and know what and how big of a data set they are comparing.

Another important part is using the return value correctly. From the manual page:

The memcmp() function returns an integer less than, equal to, or greater
than zero if the first n bytes of s1 is found, respectively, to be less 
than, to match, or be greater than the first n bytes of s2.

The take away from this is if you want two values to be equal, memcmp should be returning 0, any other value means they are not equal.

An example:

/* memcmp example */
#include <stdio.h>
#include <string.h>
 
int main ()
{
  int res;
  char b1[] = "abcDEF123";
  char b2[] = "abcdef123";
 
 
  res = memcmp(b1, b2, sizeof(b1));
 
  if(res > 0) 
    fprintf(stdout, "result: %d, '%s' is greater than '%s'.\n",res,b1,b2);
  else if(res < 0) 
    fprintf(stdout, "result: %d, '%s' is less than '%s'.\n",res,b1,b2);
  else 
    fprintf(stdout, "result: %d, '%s' is the same as '%s'.\n",res,b1,b2);
 
  return 0;
}

The result of running this program produces:

$ ./memcmp_test
result: -8192, 'abcDEF123' is less than 'abcdef123'.

This is because it compares the actual values, the ascii values of capital letters are smaller numerically than lower case.

How does memcmp work?

The actual implementation of memcmp is interesting. It accounts for the Endianness of your operating system and will swap Endianness when appropriate to ensure correct comparison is done. It then systematically compares each byte by byte validating if they are equal, if at any point they are not the function will return the result.

Click here to view the source code of memcmp.c

Find Your Interface Index In C

Upon system boot, the kernel will assign an interface index to each new device added. There are various ways to get the interface index, including an ioctl call, using the C function if_nametoindex(), as well as the “/sys/class/net/eth0/ifindex”. I will explore these three options with examples here.

Get Interface Index Using An ioctl Call

To retrieve the interface index using an ioctl call we must create a socket and populate the ifreq structure, as I showed in my previous What Is My Interfaces MAC Address?. For example:

// Headers needed
#include <net/if.h>
#include<netinet/if_ether.h>
#include <net/if_arp.h>
#include <netpacket/packet.h>
#include <net/ethernet.h>     /* the L2 protocols */
#include <asm/types.h>
#include <linux/sockios.h>
#include<stdio.h>
#include <stdlib.h>
#include <string.h>
#include <unistd.h>
#include <errno.h>
 
int get_interface_index(const char *interface_name)
{
      struct ifreq ifr;
      int fd;
 
      memset(&ifr, 0, sizeof(ifr));
 
      // setup ifr for ioctl 
      strncpy (ifr.ifr_name, interfaceName, sizeof(ifr.ifr_name) - 1);
      ifr.ifr_name[sizeof(ifr.ifr_name)-1] = '\0';
 
      // create socket
      fd = socket(PF_PACKET, SOCK_RAW, htons(ETH_P_ALL));
      if ( fd == -1) {
             fprintf(stderr," Could not create raw socket:  %s \n", strerror(errno));
             return -1;
      }
 
      // get index 
      if (ioctl(fd, SIOCGIFINDEX, &ifr) == -1)
      {
              close(fd);
              return (-1);
      }
      // close socket if created locally
      close(fd);
 
      return ifr.ifr_ifindex;
}

To create the raw socket you have to run this binary as root. The output from using this function on my system is:

# ./get_index eth0
eth0
3
# ./get_index eth1
eth1
2

So on my system, eth0 is actually indexed at 3 and eth1 is indexed at 2. This may seem counter-intuitive but it is just based on how the kernel registers the devices, for instance eth1 may be an on board network card while eth0 is a PCI network card.

Get Interface Index Using ‘if_nametoindex()’

If you know the name of the interface you are trying to retrieve the index from, you can make a C call to if_nametoindex() and get that value. The functions definition is:

unsigned if_nametoindex(const char *ifname);

It is defined in <net/if.h>. It needs the name of the interface as a parameter and returns the index, or 0 upon failure.

Retrieve Index Using /sys/

The /sys/ or sysFS filesystem is a virtual filesystem that provides information about system devices and drivers to userspace. Some of that information is interface information, including the index. If you head over to “/sys/class/net/” you will see a directory containing all interfaces on your system. On my system:

/sys/class/net$ ls
eth0  eth1  lo  vmnet1  vmnet8

I have five interfaces including the loopback. Within each of these directories is the unique information related to that interface. For example:

$ ls -l eth0/
total 0
-r--r--r-- 1 root root 4096 2011-03-24 16:15 address
-r--r--r-- 1 root root 4096 2011-03-24 16:15 addr_len
-r--r--r-- 1 root root 4096 2011-03-24 16:15 broadcast
-r--r--r-- 1 root root 4096 2011-03-24 16:15 carrier
lrwxrwxrwx 1 root root    0 2011-03-24 16:15 device -> ../../../0000:00:14.0
-r--r--r-- 1 root root 4096 2011-03-24 16:15 dev_id
-r--r--r-- 1 root root 4096 2011-03-24 16:15 dormant
-r--r--r-- 1 root root 4096 2011-03-24 16:15 features
-rw-r--r-- 1 root root 4096 2011-03-24 16:15 flags
-rw-r--r-- 1 root root 4096 2011-03-24 16:15 ifalias
-r--r--r-- 1 root root 4096 2011-03-24 16:15 ifindex
-r--r--r-- 1 root root 4096 2011-03-24 16:15 iflink
-r--r--r-- 1 root root 4096 2011-03-24 16:15 link_mode
-rw-r--r-- 1 root root 4096 2011-03-24 16:15 mtu
-r--r--r-- 1 root root 4096 2011-03-24 16:15 operstate
drwxr-xr-x 2 root root    0 2011-03-24 16:15 power
drwxr-xr-x 2 root root    0 2011-03-24 16:15 statistics
lrwxrwxrwx 1 root root    0 2011-03-24 16:15 subsystem -> ../../../../../class/net
-rw-r--r-- 1 root root 4096 2011-03-24 16:15 tx_queue_len
-r--r--r-- 1 root root 4096 2011-03-24 16:15 type
-rw-r--r-- 1 root root 4096 2011-03-24 16:15 uevent

Hey! There is a file called ifindex! I wonder what that is for? Lets output its values:

$ cat eth0/ifindex 
3

Well look at that, it matches our earlier output from the ioctl call. What are the odds?! You will also notice files such as ‘broadcast’, ‘address’, that provide the broadcast address and MAC address respectively.

How To: Use C Macros Efficiently in Your Code

Earlier I wrote about using C debugging macros when designing and unit testing your code. This how-to will outline other uses of C Macros.

1. Using C Macros for the so-called Magic Number

One great way of taking advantage of the C Preprocessor is to use Macros for any numbers in your code that you may want to change in the future, and is referenced multiple times in your code. This saves time because if that variable value needs to be changed, it can be done in only one place. For instance:

#define MAX_PACKET_SIZE 65535

Thus if you were allocating a buffer size, you only need to modify that value. Macros are also usually defined at the top of your code (it must be defined at an earlier line than when you plan to reference it, unless you have it defined in your header file).

So if you had something like this as a ridiculous example:

data_buffer[MAX_PACKET_SIZE];
 
for(i = 0; i < MAX_PACKET_SIZE; i++){
    fprintf(stderr, "%u\n", MAX_PACKET_SIZE);
}

You now have to only modify the #define set earlier and the preprocessor will replace every reference to MAX_PACKET_SIZE with that value.

2. Using C Macros for Basic Functions

Lets say you knew you needed to a lot of multiplication in your program.

#define MULT(x,y) (x) * (y)

Now you can call MULT(5,6) which will spit out 30.

3. C Macro to Comment Out Code

Another very handy use of C macros is when commenting out code. If you have already commented out a block of code using /* … */ then within that block you have another set of /* … */ and perhaps a few //. You can actually just do:

#if 0
/* comment ...
*/
 
// code
 
/* comment */
#endif

This will actually remove all code during compilation that exists between your definitions.

4. Using C Macros to Compile for Target Architecture(s)

Sometimes you may need to compile a certain block of code if running on a Win32 machine versus a Unix based environment. For example:

#ifdef WIN32
  print(stdout, "Hello\n");
#else
  fprintf(stderr, "Yay Linux Machine\n");
#endif

This way you can pass in -DWIN32 to gcc to compile your program for a Windows machine.

5. Using a C Macro to Swap Two Variables

A very handy swap function can also be written in Macro form that will swap the values of two variables. This can become handy if implementing a various sorting algorithms where values must be swapped.

/*
 * Swaps two values.
 * Requires tmp variable to be defined.
 */
#define SWAP(x, y) \
  do { \
    tmp = x; \
    x = y; \
    y = tmp; } \
  while (0)

Wrapping this in a do-while ensures that our swap function is executed only once.

Using Macros in your C program can be useful at times, especially to rid your code of magic numbers with basic #defines. When creating functions for basic evaluation can be handy but it has its draw backs. There is a great article here outlining some of the pitfalls of C macros. As long as you are aware of what you are doing C macros can be very handy.

How To: Execute Shell Commands in C Using system() Or popen()

This article will outline how to call shell commands from your C program using the system() call and the popen() functions. The system() call and the popen() call each have their place and differ enough to give an example and explanation of both.

Execute a Shell Command Using system()

The system() function takes a string as its argument, this string should consist of the shell command you wish to call. Its return value must be run through another function call to retrieve the result of your executed shell command. For example, if you typed ls on the command line, its return value is 0 if it was successful. Let me show you:

int run_sys_call(char *buffer)
{
    int res;
    res = system(buffer);
    if ( WEXITSTATUS(res) != 0 ) {
                syslog(LOG_CRIT," System call failed.\n");
                syslog(LOG_CRIT," %s\n",buffer);
    }
    return res;
}

OR more simply:

int res;
// This will execute the LS command in the current directory, 
//     unfortunately the result is just an exit code.
res = system("ls -l");

This function takes a character array, then passes this string into your “system()” function. The return value is -1 on error, or the exit code of the command WEXITSTATUS(res). This way if you were calling a Bash script it may have various exit codes, this allows you to get that exit code. The downside of the system() function is you couldn’t grab say data in a file, or if you were to “cat” a file you could only get the exit code as the return value and not the contents of that file. This is where popen() comes into play.

Execute a Shell Command Using popen()

The popen() command allows a user to execute the shell command exclusively as a read or a write. The function is a pipe stream that opens a process by creating that pipe, forking, and invoking a shell! All from one command, not too bad, not too bad at all. The return value from popen() is a normal standard I/O stream and must be closed with pclose() rather than fclose(). Writing to such a stream writes to the standard input of the command; the command’s standard output is the same as that of the process that called popen(), unless this is altered by the command itself. Reading from a “popened” stream reads the command’s standard output, and the command’s standard input is the same as that of the process that called popen().

#define COMMAND_LEN 20
#define DATA_SIZE 512
 
void get_popen_data()
    FILE *pf;
    char command[COMMAND_LEN];
    char data[DATA_SIZE];
 
    // Execute a process listing
    sprintf(command, "ps aux wwwf"); 
 
    // Setup our pipe for reading and execute our command.
    pf = popen(command,"r"); 
 
    if(!pf){
      fprintf(stderr, "Could not open pipe for output.\n");
      return;
    }
 
    // Grab data from process execution
    fgets(data, DATA_SIZE , pf);
 
    // Print grabbed data to the screen.
    fprintf(stdout, "-%s-\n",data); 
 
    if (pclose(pf) != 0)
        fprintf(stderr," Error: Failed to close command stream \n");
 
    return;
}

The popen() function takes either “r” for reading or “w” for writing. This example shows grabbing a process listing from the shell and reading it back through the pipe then displaying it to the screen.

Depending on what you need to achieve and what results you need from the shell command, system() and popen() should cover the basic for executing shell commands.

How To: Use fprintf in C

The fprintf() function is probably my favourite (yes I am in Canada, and this is how it is spelled) stream output function. The beauty of fprintf over printf is it allows you to specify what stream you would like to output to, whereas printf will always output to standard out. In fact I use fprintf as part of my debugging macros in C, that I mentioned in an earlier article. The other interesting thing about the fprintf function is its ability to format output in a human readable form (in some cases).

The basic function is:

int fprintf(FILE *stream, const char *format, ..

Where the … is the sequential order of variables matching the format characters used.

Output to Standard Out Using fprintf

Here is a quick example of fprintf printing to standard out, as well as various formatting options available to it.

#include <stdio.h>
 
int main(int argc, char **argv)
{
  fprintf(stdout,"Day: %s,#1: %d,#2: %05d,hex: %x,float: %5.2f,unsigned value: %u.\n",
              "Tuesday", 1337, 89, 255, 3.141592654, 1250);
 
  return 0;
}

erik@debian:/fprintf_example$ ./fprintf_example
Day: Tuesday, #1: 1337, #2: 00089, hex: ff, float: 3.14, unsigned value: 1250.

Now that’s not so bad, is it. So as you can see,

  • %s is printing out my string of “Tuesday”.
  • %d is used for decimal values, in this case 1337.
  • %05d is also decimal, but the 05 states 5 (five) decimal places.
  • %x is used to display a value in hexadecimal, in our case 255 which is FF in hex.
  • %5.2f or f for floating point, in this case two decimal places.
  • %u is used for an unsigned value.

This example also shows us using stdout for standard out as the first argument to fprintf. This can be replaced by, stdout, stderr or a file handle on a previously opened file.

Output to a File Using fprintf

The first argument of fprintf takes a stream pointer, so we can actually pass in a file handle that has been opened previously. Refer to my earlier File Input / Output in C – Examples for some tips on doing so.

FILE *fp;
fp = fopen( "out_file.txt", "w" ); // Open file for writing
if(fp)
  fprintf(fp, "Hello %s\n", "reader");

Return Value of fprintf

The return value of fprintf is the number (as an integer) of characters that was written to whichever stream you are using, excluding the ‘\0′ or endline character.

For more formatting options refer to the manual page of fprintf here.

How To: Use ‘strcpy’ In C

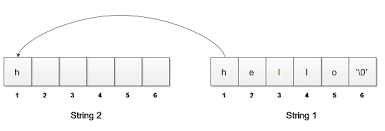
A function that I use quite often in C is strcpy. The strcpy function allows the programmer to copy one string to another. This is beneficial if you want to parse or modify a string without affecting the original or if you want to store a string in a structure during processing. The function strcpy will automatically copy the null terminating byte within your string to the destination string, how handy is that! The goal of this article is to give you a few examples of using strcpy and a few things to avoid.

Function Definition Of strcpy

The strcpy function is quite basic and is defined as:

// Header Include
#include <string.h>
 
// Function definition
char *strcpy(char *dest, const char *src);

As you can see from the function definition the mapping is much like assigning a value to a variable, from right to left. In this case we must ensure our char *dest has enough space allocated to copy the source string to, otherwise strcpy will write into who knows what. It is also very important that our strings do not overlap in memory otherwise the validity of the strcpy execution cannot be trusted. I always err on the side of caution and allocate the space for my soon to be copied string with malloc. For an in-depth look at malloc refer to my malloc article. When allocating memory, remember to include space for the null terminating character as well.

Example Program Using strcpy

This quick example shows the use of strcpy and includes the strlen function and the use of malloc.

#include <stdio.h>
#include <stdlib.h>
#include <string.h>
 
int main ()
{
	char base_str[]="Erik was here.";
 
	// Add the + 1 for the null terminator '\0'
	char *cpy_str = (char *)malloc(strlen(base_str) + 1 * sizeof(char));
	if(cpy_str == NULL){
		fprintf(stderr, "Could not allocate memory for our strcpy.\n");
		return -1;
	}	
 
	strcpy(cpy_str,base_str);
 
	fprintf(stdout,"Base str   : -%s-\n", base_str);
	fprintf(stdout,"Copied str : -%s-\n", cpy_str);
 
	free(cpy_str);
 
	return 0;
}

The output of this program is as expected:

$ ./copy 
Base str   : -Erik was here.-
Copied str : -Erik was here.-

In the example above I allocated the memory dynamically, if you know that the length of the string will be static than you can create your destination string statically as well. As a quick example:

char base_str="Erik was here.";
char dest_str[20];
 
// We could also use strlen for this static allocation
char dest_str_two[strlen(base_str) + 1];
 
strcpy(dest_str,base_str);
strcpy(dest_str_two,base_str);

The strcpy Gotchas

In conclusion, strcpy is very useful for copying strings for parsing or quick duplication of string data. There are a few things to remember:

  1. If the source and destination strings overlap the use of strcpy is undefined, and could be dangerous for your data.
  2. strcpy will copy the null terminating string, if you plan to allocate memory on the fly for the destination string remember to include space for the null terminator.
  3. Ensure the destination string is long enough to store the original string including the null terminator.

There you have it, strcpy explained!

How To Create And Manipulate C Structures

Grouping data in C can be done using C structures. These c structures can be grouped as an array of structs if need be. The advantage of using structures in c allows the programmer to better pass data between functions, easier access to specific fields within that structure, can use typedef’s to better represent that data. Structures are used to create linked lists, binary trees, among other data structures. The question is, how do we create and use these structures?

I hope to outline the basics of a C struct and its many uses in this article.

What Does a ‘C Structure’ Look Like And How Do We Use It?

A structure in C is nothing special really, once you get the syntax down they are a piece of cake, for example:

struct data {
   int number;
   char *name;
   double id;
};

This is a structure named ‘data’. To create an instance of one there are a few options:

struct data data_one; // This creates a single data structure called data_one

OR in our definition we can do:

struct data {
   int number;
   char *name;
   double id;
} data_one;

This defines and creates 1 structure of data called data_one. Now that we have a single structure called data_one, how can we access the variables within it? Because we are referencing the structure directly, rather than using a pointer to it, we use the . For example:

data_one.number = 5;
data_one.name = &some_string_address;
data_one.id = 12;

Now our structure contains those values, the beauty of this is we can just pass the structure around, rather than passing all three variables around at once. This is somewhat cumbersome to create structures this way, instead we could create a type using typedef.

Creating a ‘C’ Struct As a Type

Okay, lets say we are planning to use our structure “data” a lot, and we would be creating many of them. We can create a type to easily create new instances of this structure in our code.

struct data {
   int number;
   char *name;
   double id;
};
typedef struct data data_t;

We now have a data type called data_t that is actually our data structure. Cool! So what does that mean? This means that we have a data type just like an int, or a float, its just our data type happens to be a structure containing some of those types. This makes it quite easy to make new instances of our structure.

  data_t eriks_data;
  eriks_data.number = 5;
  eriks_data.id = 12;
 
// Or create a data structure on the fly for me to point to.
  data_t *eriks_data_struct_ptr = (data_t *)malloc(sizeof(data_t)); 
  if(eriks_data_struct_ptr)
      eriks_data_struct_ptr -> number = 5;

The above example shows how we can take advantage of the typedef’d data_t but also how to create an instance of our structure on the fly using malloc and pointers. In the pointer example, we reference the member number differently using the -> symbol indicating we are pointing rather than referencing directly.

Create Array Of ‘C’ Structures

So now we have the data type data_t for use just like any other data type. Lets say you know you need twenty (20) of them. Well just like any other array, we can simply do:

   data_t eriks_data[20];  // This will create twenty instances of our structure.

Or, if we had not created our type using typedef we can just do:

struct data eriks_data[20];

Its really that easy. You can think of our type definition as any other type.

Get A File’s Size In C

Ever wanted to get the size of a file from your C process? Guess what, you can! Amazing, I know. It is a basic function call to find the file size in c of your specified file.

I will provide the function, a sample program, and some executable examples.

Use The stat Function To Get File Size

The stat function provides a set of information to the user, its definition is as follows, as well there are 3 #includes required.

#include <sys/types.h>
#include <sys/stat.h>
#include <unistd.h>
 
int stat(const char *path, struct stat *buf);

The function takes two arguments. The file path, which can include files, sockets, unix domain sockets, directories because as we all know everything in Linux / Unix are files!

To get the information about our file, the stat function populates a C structure with a set of file information.

The stat structure definition from the stat manual page.

struct stat {
           dev_t     st_dev;     /* ID of device containing file */
           ino_t     st_ino;     /* inode number */
           mode_t    st_mode;    /* protection */
           nlink_t   st_nlink;   /* number of hard links */
           uid_t     st_uid;     /* user ID of owner */
           gid_t     st_gid;     /* group ID of owner */
           dev_t     st_rdev;    /* device ID (if special file) */
           off_t     st_size;    /* total size, in bytes */
           blksize_t st_blksize; /* blocksize for file system I/O */
           blkcnt_t  st_blocks;  /* number of 512B blocks allocated */
           time_t    st_atime;   /* time of last access */
           time_t    st_mtime;   /* time of last modification */
           time_t    st_ctime;   /* time of last status change */
    };

The field within this structure we are interested in is off_t st_size that holds the files size in it. As you can see we can actually retrieve a lot of extra information from this structure regarding the file.

To grab this structure we need the path to the filename and a stat structure, for instance:

u_int32_t get_file_size(const char *file_name) 
{
        struct stat buf;
        if ( stat(file_name, &buf) != 0 ) return(0);
        return( buf.st_size );
}

This function takes the path as an argument and returns the file size in bytes. stat will return -1 on error, and zero on success.

Example Program To Get File Size In C

Putting all this information together, here is a quick program that uses the first command line argument as the file name or path to the file, and spits out the file size in C.

#include <stdio.h>
#include <sys/stat.h>
#include <sys/types.h>
 
u_int32_t get_file_size(const char *file_name) 
{
        struct stat buf;
        if ( stat(file_name, &buf) != 0 ) return(0);
        return( buf.st_size );
}
 
int main(int argc, char **argv)
{
    fprintf(stdout, "%u\n", get_file_size(argv[1]));
 
    return 0;
}

Executing this program:

erik@debian:/home2/erik/experiments/fsize$ ./fsize .
4096
erik@debian:/home2/erik/experiments/fsize$ ls -l
total 16
-rwxr-xr-x 1 erik erik 8658 2011-03-07 14:12 fsize
-rw-r--r-- 1 erik erik  307 2011-03-07 14:12 fsize.c
erik@debian:/home2/erik/experiments/fsize$ ./fsize fsize.c 
307
erik@debian:/home2/erik/experiments/fsize$ ./fsize fsize
8658

Looking at the above output, I first passed in a “.” which means the current directory I am in. All Linux directories are of file size 4096 bytes. I then did an output of the current directory contents using ls which displays the binary file I am running, and the source code of the program in the .c file. As you can see the file sizes match! Yay it worked!

stat is a very useful function for getting other information about your file, it is not just for getting the file size.

Craft Packets with Libnet

I have written a few posts about packet crafting using the basic C functions, specifically using sendto() of a packet buffer in my article ICMP Smurf Attack as well as how to create a program for doing a TCP Syn Flood with a Raw Socket. There is however, a cleaner, more efficient way of packet crafting. It also allows you to send out specific interfaces, create a packet for special ethernet frames like VLAN, or 8023 frames – all with a simple function call. You could probably guess from the title of the article that I am referring to Libnet. Before I go any further I want to outline a few links that I found quite useful for my packet crafting endeavours:

Example: Craft and Send an IP Packet

Libnet requires you to build the packet in reverse. So for this example we will create the IP header prior to creating the Ethernet header. There are also a few options during the initialization phase, in particular stating which Injection type you would like to use:

  • LIBNET_LINK – Link layer interface. The developer needs to create packets down to the link layer.
  • LIBNET_LINK_ADV – Link layer interface in advanced mode. This allows the developer additional control over the packet being created.
  • LIBNET_RAW4 – Raw sockets interface for IPv4 (normal Internet IP). The developer needs to create packets down to the Internet layer.
  • LIBNET_RAW4_ADV – Raw sockets interface for IPv4 in advanced mode. This allows the developer additional control over the packet being created.
  • LIBNET_RAW6 – Raw sockets interface for IPv6 (next-generation IP).
  • LIBNET_RAW6_ADV – Raw sockets interface for IPv6 in advanced mode. This allows the developer additional control over the packet being created.

Depending on your needs, you may decide LIBNET_RAW4 is enough for you, thus the Ethernet layer is provided by libnet. For our example, as mentioned above, will include both IPv4 layer and Ethernet layers.

1. Initialize the Libnet Handle

In this example we assume the ether_header contains the data we require, as well as the IP header

#include <unistd.h>
#include <stdio.h>
#include <stdlib.h>
#include <string.h>
#include <sys/socket.h>
#include <net/ethernet.h>
#include <netinet/ip.h>
#include <netinet/udp.h>
#include <netinet/in.h>
#include <arpa/inet.h>
#include <libnet.h>  /* Must include libnet header */
#include <syslog.h>
 
int send_packet(struct ether_header *ether, struct  iphdr *ip)
{   
        int bytesSent = 0;
	libnet_t *l;  /* Libnet Handle */
	libnet_ptag_t etherTag;  /* Return code handle for ethernet header */
	libnet_ptag_t ipTag;  /* Return code handle for IP header */
	char errbuf[LIBNET_ERRBUF_SIZE]; /* Libnet Error Buffer */
 
	if(!ether || !ip){
		fprintf(stderr, "Invalid data packet\n");
		return -1;
	}
 
	/*
	*  Libnet Handle Initialization.
	*/	
	l = libnet_init(LIBNET_LINK_ADV, "eth0", errbuf);
	if(l == NULL){
		fprintf(stderr, "ERROR: getLibnetSocket(): libnet init failed: %s \n", errbuf);
		return(-1);
	}

The second argument for the libnet_init function is the interface in which you can send your packet out. Now we build the IPv4 header.

2. Build the IPv4 Header

Since our last header (we are only going to the IP header), this must be built prior to the Ethernet Header.

ipTag = libnet_build_ipv4(
	LIBNET_IPV4_H,   /* length */
	0,               /* TOS */
	242,             /* IP ID */
	0,               /* IP Frag */
	64,              /* TTL */
	IPPROTO_UDP,     /* protocol */
	0,               /* checksum */
	ip->saddr,	 /* source IP */
	ip->daddr,	 /* destination IP */
	NULL,            /* payload */
	0,               /* payload size */
	l,               /* libnet handle */
	0); 

if (ipTag == -1) {
	fprintf(stderr, "ERROR: setup of crafted IP packet failed: \n");
	fprintf(stderr, "ERROR: on IP packet craft: %s\n", libnet_geterror(l));
	goto error;
}

Since there is no payload our payload points to NULL and the size is set to 0. The first argument is the total length of the IP packet including all subsequent data, since we don’t have a UDP or TCP header, its simply the LIBNET_IPV4_H – header length.

3. Build the Ethernet Header

The call to building the Ethernet frame. This example assumes the Ethernet header information is passed to this function:

etherTag = libnet_build_ethernet(
	ether->ether_dhost,	/* destination address */
	ether->ether_shost,	/* source address */
	ETHERTYPE_IP,		/* type of encasulated packet */
	NULL,			/* pointer to payload */
	0,			/* size of payload */
	l, 			/* libnet context */
	0); 			/* libnet protocol tag */
if (etherTag == -1) {
	fprintf(stderr, "ERROR: setup of crafted Ethernet packet failed: \n");
	fprintf(stderr, "ERROR: on Ethernet packet craft: %s\n", libnet_geterror(l));
	goto error;
}

4. Incorporate Valid IP Checksum

This is important if you want your packet to actually be sent, or received. In some cases packets with invalid checksums will not leave the wire, or the receiving entity will merely drop the packet.

libnet_toggle_checksum(l, ipTag, LIBNET_ON );

If we also had a TCP header, this function will properly set the IP and TCP checksums. Since we only have the IP header, this function will just set the IP checksum. Notice the ipTag variable passed the function. This was the return handle provided by the ipTag = libnet_build_ipv4( function.

5. Send the Packet and Close Handle

The most important piece of the puzzle. Actually send the packet!

bytesSent = libnet_write(l);
 
if (bytesSent == -1) {
	fprintf(stderr, "Error: write error for crafted packet: %s\n", libnet_geterror(l));
	goto error;
}else
	fprintf(stdout, "Packet sent: %u\n", bytesSent);
 
/*  Shut down the interface. */
libnet_destroy(l);

Conclusion

As you can see from these examples, using libnet is merely following a recipe of what you need to create. Libnet provides a large set of packet construction functions, the ability to bind to a specific interface, and even set correct checksums! All in a nice package.

There is also a thorough outline of using Libnet here: Libnet Tutorial